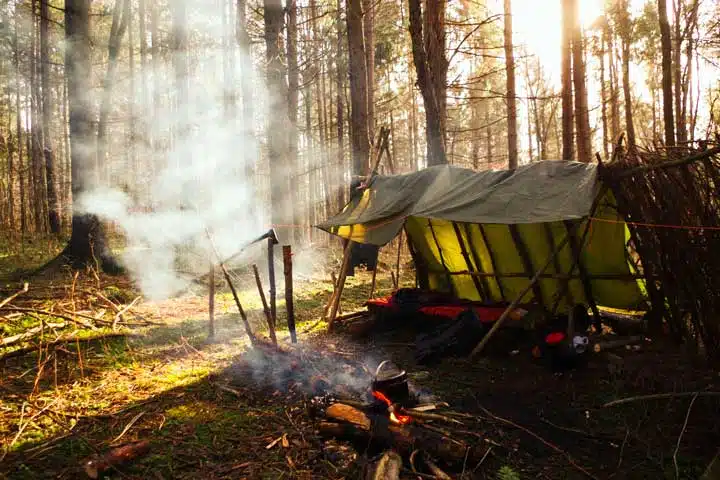
What is a tarp shelter for bushcraft? When engaging in bushcraft, there are a few areas you need to prioritize, including food, water, fire, and shelter. A tarp is a great option when you need a waterproof bushcraft shelter option.
Survival shelters protect from the cold, heat, rain, snow, and wind. Avoiding exposure is a vital part of bushcraft. Whether you are going out in the wilderness for several nights or an afternoon, you should know how to build a shelter. Plus, it can be an essential home base while you explore using bushcraft.
Instead of gathering wood to make an entire shelter, a tarp allows you to erect a shelter quickly and efficiently. Some purists may reject this method of shelter building since it requires using supplies not derived from the natural world. However, this shelter is good to have in your back pocket, especially as you start gaining bushcraft skills.
As someone experienced with bushcraft, I know how to make several types of shelters. Knowing how to make a variety of shelters helps you adapt to different environments and situations. Each option has its benefits and drawbacks. The bushcraft tarp tent is convenient, water-proof, and efficient.
In this article, I will describe the importance of building a good shelter and how you can accomplish this task with a tarp. Read on to learn about this essential element of bushcraft.

What Is a Tarp Shelter?
A tarp shelter is a tarp used to provide shelter instead of a tent or wooden shelter. These tarps may be a sheet made from plastic, nylon, or fabric. Usually, the tarps used for shelters consist of plastic and other waterproof materials rather than porous fabric.
These tarps are lightweight compared to other common shelter materials, such as wood and stones. As a result, they are easy to fold and carry in your camp backpack. Plus, they allow you to be closer to nature than camping in a tent or cabin. However, they still provide a bit more comfort than other types of bushcraft shelters.
These tarps can come in several different sizes. The best size to start with is between 6×8 feet and 9×12 feet. The smaller size will be fine for one person, while larger sizes work for multiple people.
How Do You Use a Tarp Shelter?
A tarp shelter’s basic use is protecting you from the elements. There is no single best way to use this tool, and it is good to experiment with a few different techniques to see which option works best for you and your particular circumstances.
You can make a tarp shelter using an A-frame approach, a C-fly approach, as part of a lean-to, or as part of a wind-shed. Each of these structures has benefits in different environments. For example, a wind-shed tarp shelter is ideal in dry and windy environments. This structure is open on one side, providing ventilation, space, and protection from the wind.
There are a few types of A-frame shelters that provide respite from the wind and other adverse weather. You can choose between an open and closed A-frame depending on how much ventilation or protection from the elements you need. A fully closed A-frame is often the best overall protection from wind and rain.
A C fly structure, also known as an envelope, protects one side and the groundwater. One side is open. So, this shelter is not ideal in the rain. However, it can be great if you are in a damp area with mild weather.
In addition to providing shelter, tarps have numerous other uses in bushcraft, camping, and overall wilderness survival. When camping in a tent or other shelter, a tarp on the ground can keep the bottom of your shelter dry or provide rain protection over different bushcraft tarp shelter designs.
What Do I Need for a Tarp Shelter?
There are pre-made tarp shelters you can purchase at backcountry and camping supply stores. However, in the spirit of bushcraft, it is a good idea to know how to make your own. Here are the supplies and skills you need to make a successful tarp shelter.
Tarp
The most vital component of a tarp shelter is the tarp itself. These come in several shapes, sizes, and materials. Each option can work in different conditions. To gain the full benefits of a waterproof tarp, select one made out of plastic or another waterproof material. Picking a tarp with grommets will make creating a shelter easier. However, grommets are not strictly necessary.
Stakes
Stakes help secure the shape and position of a tarp shelter. Several materials will work as stakes in your bushcraft tarp shelter. Try options including stakes, hiking poles, wood sticks, and tent pegs. Trees can also be useful in shelter-making and serve a similar purpose as stakes.
The number of stakes you need will vary depending on the type of shelter you wish to make. A lean-to will need between two and four stakes, while A-line and C-fly will need at least four stakes. In some cases, shelters will need up to six stakes.
Cordage
Cordage such as rope, strong twine, or bungee cords is necessary for most tarp shelters. It can suspend a tarp, secure the tarp to the stakes, and provide flexibility. Those with advanced bushcraft skills may make cordage themselves. However, if you are new to this skill set, you can bring some with you.
Cordage skills
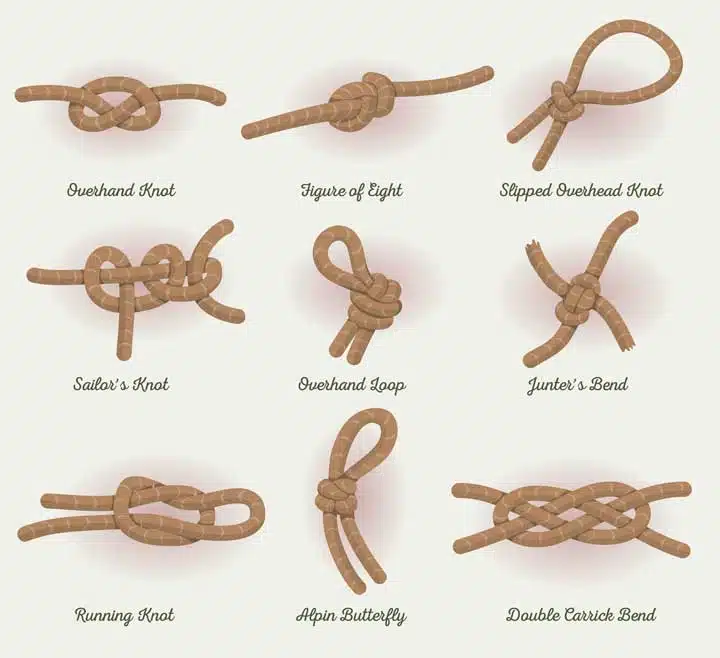
Knowing some key knots can help create a sturdy and reusable tarp shelter. Part of bushcraft is understanding a variety of knots and knowing the best time to use them. Some essential knots are the half-hitch, clove-hitch, bowline, and taut-line hitch.
Half-hitch knots are ideal for suspending a light load or supporting other knots. A clove hitch works well for attaching stakes. Use a bowline to create a stable loop within the rope, making them ideal for stabilizing your tarp with a tree. A taut-line hitch helps to stabilize the rope in a grommet.

How Do You Make a Survival Shelter With a Tarp?
The way you make a bushcraft tarp shelter will depend on the type of shelter you choose to make. However, there are a few key steps you will need to take for most tarp shelter types.
Lay out the tarp in the general position you want it to be in. The exact layout will vary depending on the type of shelter you wish to make
Next, pin any corners you want into the ground with pegs, stakes, or other materials. You may need to tie the tarp to the stakes with some cordage variety. This step helps protect you from wind and other elements.
Take a pole or other long stick and use it to prop up the front of the tarp. You may need to move the pole around to achieve the proper tension. Reinforce the pole with ties or stakes. Only use the shelter once you triple-check the security of the poles and knots.
In some cases, you may suspend your tarp on some cordage, and you can reinforce it with a pole. A lean-to will often involve suspension using cordage from trees reinforced with poles, and more cordage.
If you choose, you can create an entrance flap, or leave the entrance open. In some cases, you may need to pin down part of the flap to create an entrance.
Frequently Asked Questions
I want you to be fully prepared, so I gathered the answers to some common questions.
What are other types of bushcraft shelters besides tarps?
There are a plethora of other survival shelters you can make using tarp shelter bushcraft. Many previously described tarp shelter varieties can also be made using wood and other materials. A-frames and lean-tos are common choices for wooden shelters. Sometimes you can also repurpose hollow trees and caves as a shelter if you can not find other supplies.
Other structural materials include stone, sod, leaf debris, and animal skins. Waterproofing materials include reeds, leaves, grass, spruce, and moss.
You can also use wood to make a tipi, round lodge, tree pit shelter, and hammock shelter. If you are in a snowy area, quinzhees, igloos, and other snow caves are good choices for shelters. Some varieties of shelters can even house a fire. However, it is essential to understand fire safety thoroughly before trying a fire in a shelter.
What safety do I need to consider with a bushcraft tarp shelter?
Good safety is paramount when it comes to bushcraft. A shelter should be a haven from the variables that may risk that safety. So, it is essential to make a shelter as safe as possible.
The first step in prioritizing safety is choosing a good location for your shelter. Avoid hazards such as overhanging tree branches, insect homes, and standing water. You will also make less work for yourself if you pick a spot near bushcraft supplies.
Regarding safety within the shelter, choose sturdy building supplies, and integrate ventilation and warmth into the building. Only use supplies you know are safe and avoid insect-infested supplies or poisonous plants. Avoid plant materials that may attract animals.
How long does a tarp shelter last?
The typical tarp shelter lasts for about a week before signs of wear become apparent. Some varieties may last for more or less time, depending on the materials you choose, weather, and other conditions. Vinyl tarps last longer than other varieties.
To help your tarp last as long as possible when not in use, store it in a dry place, away from the elements. You can also often reuse cordage as long as you tie it in a way that easily unties. Always check your cordage before embarking into nature.
Final Thoughts
A tarp shelter is a simple and reliable type of bushcraft shelter. Using only a lightweight tarp, some stakes, and some cordage, you can make a little wilderness home that will protect you from the elements. As you develop your skills you can practice making all the different iterations of this type of structure.
Building a good shelter is just one of many essential bushcraft skills you can discover. Once you have a shelter, it is also vital to find food, purify water, and build a fire. Learn more essential bushcraft skills by reading other articles on this blog.


