Whether you are out camping or have found yourself in a survival situation, building a shelter is a priority to provide safeguard. However, if you have no previous experience building a shelter, it could be that you find yourself at a loss. As surviving the elements by building shelter could be what makes a difference between life or death, you will want to know at least a few techniques on how to accomplish this.
The Purpose of Shelter
In order to build shelter, you require a set of essential skills that will allow you to protect yourself from the weather, wildlife and danger in general. Because ultimately, although you could potentially survive for a while without food or water, you may not even survive a single day without shelter.
The main purpose of shelter is to provide protection from the elements, warmth, a dry environment and a safe place to rest. Once shelter has been taken care of, it is possible to move on to making a fire, finding water and food as soon as possible.
While most of the time we have the luxury of choosing our shelter, there are certain circumstances that put us in the situation when we cannot choose and must protect ourselves from the elements.
A WORD FROM THE AUTHOR:
Inform your loved ones about where you will be during your trip so that someone is aware of your location. Take into account that no matter the location, you always have the possibility of something going wrong and finding yourself in trouble.
By doing this, you have a better chance of someone sending for help if you fail to communicate.
Analyzing the Situation
In an emergency situation one is rarely prepared. However, although you may have little to no equipment readily at hand, a mere survival knife and some cordate would suffice. The knife is the one tool you should at least always carry with you in any type of excursion.
If you don’t have cordage or any other tool, you will have to become an ally with nature and your surroundings, which will more than likely provide you with everything you need to build shelter.
The Weather: A Dangerous Exposure
Weather plays the biggest role when it comes to needing and building shelter, and although you may think that building shelter must be strenuous and complicated, it can actually be as simple as a heap of dry leaves that covers you entirely.
Having a tarp as part of your equipment is the best asset you could have at hand to prepare your shelter, as this can easily be used as your roof and to protect you from rain.
During the rainy season, a tarp would be an especially valuable item to have as part of your equipment, because staying dry is one of the top priorities when it comes to survival. The tarp mentioned before can be used alone or as complement of other materials to provide a roof over your head.
Do everything you can to cover the extremities of your shelter if you are in a windy environment, so that the wind doesn’t blow inside of your shelter.
Building Your Survival Shelter: It’s All About the Location
No matter how stressful your situation may be, it’s important to analyze your surroundings so that you can make camp in a place with an optimal location to aid in your survival needs.
While you’re exploring for places where you can build your shelter consider the following:
- Avoid building shelter near streams or sources of water.
- Avoid sleeping directly on the soil.
- Avoid camping near dead trees.
Building your shelter near water is dangerous due to several factors. First and foremost, animals are always near water sources to drink or hunt and some of these animals could be dangerous. As streams of water are generally noisy, it will be difficult to hear if a person or an animal is approaching you and you are in danger.
Sleeping directly on the soil can be detrimental to your health as it can drain your body temperature. Depending on how cold the weather is, this could expose you to hypothermia.
Dead trees pose a threat to your safety as branches often break easily and could fall on top of you or your shelter at any given moment. So, if you chose to camp around trees, make sure the trees are still green and alive.
Some people argue that shelter should be concealed, however this will depend according to your situation in particular. If you need to be rescued, you will certainly want to camp in a place where you will be able to be found and will be visible enough to stand out from the natural surroundings.
However, if your purpose is more focused towards survival and keeping out of sight, then you might choose to camouflage your shelter instead. But beware that camouflaging from sight may not be all you will need to keep you protected.
The best example of this are bears, the predators at the top of the food chain, who have poor vision but an exceptional sense of smell. Even if your campsite is concealed from plain sight, a bear will still be able to smell you from a long ways away.
But not all animals are dangerous. One of the safest things you could do is to look for signs of deer beds to build your shelter around this area. Deers and bucks are indicators of a safe environment, as they only sleep in places where they feel safe. In these types of situations, if it’s safe for a deer, it’s safe for you.
You can identify a deer bed by looking for flattened grass against a wall, log or rock. Deer often bed with their backs against a solid place, which is the best way you can identify that an area of flattened grass really does belong to a deer or if it belongs to what could be a more dangerous animal.
A WORD FROM THE AUTHOR:
You want to avoid areas where you see animal bones, as this could mean you are close to the den of dangerous animals.
Types of Shelter
While there are many different types of shelters, there are a few of them that are worth mentioning as they can guide you towards building the shelter that will suit your needs the most.
Although the shelters presented in the following examples showcase specific structures, you are free to use them as a base and use your creativity and ingenuity to build something different.
Consider that if you are looking into concealing your shelter you should build something with a more rustic look. Break any straight lines when possible and use natural materials to avoid standing out.
As you build your shelter, consider that the place where you will be laying down will affect your body temperature directly.
Simply touching something causes an adjustment in your body temperature, which depending on whether it’s hot or cold, will cause your body to lose or gain heat. As the ground is naturally cold, laying directly on it will undeniably cause you to lose heat. This is the reason why many campers and hikers use sleeping pads additionally to their sleeping bags.
Without a sleeping pad, body heat would be lost and the body would not have the chance to generate heat. Therefore, prevent temperature conduction by separating your body from the ground or any surface that would affect your body temperature.
The Pile of Leaves

Building shelter out of a pile of leaves is the fastest and easiest way to build shelter, however, it will require that a few elements align in order for it to function effectively, such as:
- For there to be an absence of rain so that you may stay warm.
- A lack of wind in order for the leaves to not fly away.
- Not needing your shelter for longer than one night, as it is not sustainable.
- Having plenty of leaves around to make the shelter possible.
This type of shelter is the easiest one to create as all you will have to do is surround yourself with dry leaves. Fresh leaves retain moisture and could make you cold, so dry leaves are recommended.
If you happen to have some time and tools, you can build a simple structure that will keep you off the ground, so that you can isolate your body from the cold soil. If it’s not possible to stay off the ground, make a thick bed of leaves to lay on top of during your stay.
The Lean-to Shelter
A lean-to shelter can be built by using a poncho, a tarp, a space blanket or a roof you may find in the wild. In the absence of these materials, you can use dry leaves, spruce, moss on top of a wood frame and even wood itself.
Although there are a few variations of this type of shelter, the principles of a lean-to shelter is that the walls of the shelter lean into the mainframe of the shelter.
The frame could be straight and parallel to the ground, or in a slope position leaning into a tree. The most common frame of the lean-to shelters is the square frame, which nestles on two trees or pales that are planted on the ground.
Once you have found the right location to place your shelter, build it with the entrance away from the course of the wind. With this type of shelter, the openings are normally very exposed, so it would be ideal to build this type of shelter in non-windy and non-rainy environments.
And although you will be slightly exposed from the extremities of your shelter, you can build a fire close to it to stay warm.
Materials
- Cordage
- Wood/Tarp/Poncho/Space Blanket
- Leaves/Spruce/Moss
Instructions
- To build the frame, cut a piece of wood long enough to cover your entire height and then some.
- Position the piece of wood parallel to the soil, nestled between two trees. If you have cordage at hand, you may replace the wooden frame with cordage tied between two trees.
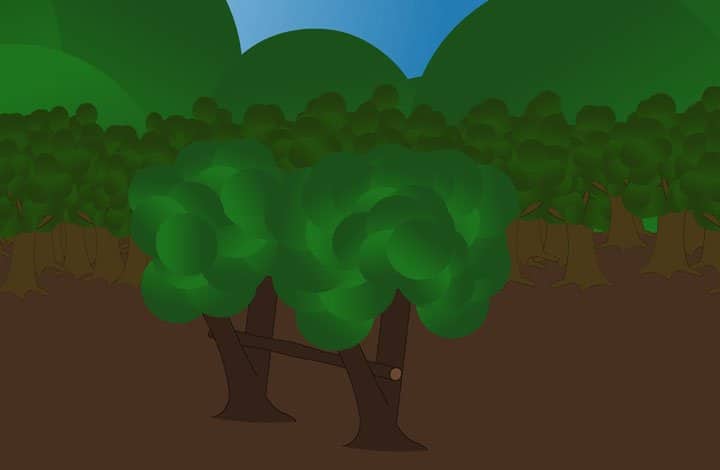
- Place branches leading from the ground up to the frame to serve as the roof. Start from the bottom to the top: the tip of the shelter should overlap the layer underneath it so that water can slide off without leaking into the shelter in case of rain.
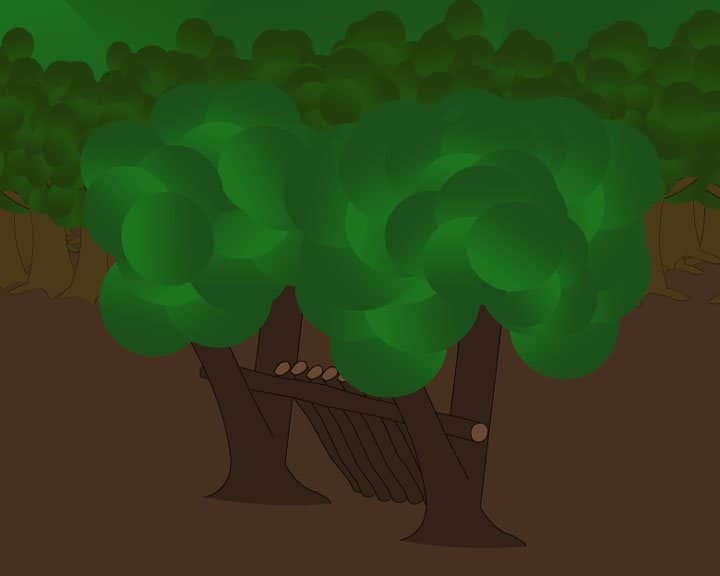
- If you use a wood frame, find branches that are long enough to lean into the frame to build the walls of the shelter. You need enough branches that are long enough to cover the entire length of the shelter, place them close to each other.
- Cover the branches with your tarp, if you have one. Otherwise, make sure you cover your roof enough so that water doesn’t drip into your shelter. You can do so by using a thick layer of spruce, leaves or moss. Start building from the bottom to the top to avoid having any water leaks.
- For your bedding, cover the ground with spruce or leaves to isolate you and provide you with softer ground to lay on top of.
- Lastly, cover the sides of your shelter so that regardless of the changes in the direction of the wind, you will not be exposed.
A WORD FROM THE AUTHOR:
- Using cordage instead of a solid piece of wood will hold up just fine as long as you don’t lay any branches on top of it and use your tarp or poncho or space blanket instead.
- Making the roof longer than the height of your body will ensure that you lay under the roof comfortably.
- Don’t forget to test the roof’s resistance before you sleep underneath it.
- Additionally to your tarp or whatever you use for your roof, you can collect leaves and moss to use for protection.
- If you want to have a concealed shelter, moss, leaves or spruce will help you stay low. Deadwood is easier to break than live wood and more ethical to use. Remember to try to use the materials found in the wild without causing much disruption to the natural habitat of the area.
Don’t forget to check the environment to find further protection as demonstrated in the video below.
A-Frame Shelter
Another great type of shelter is the A-frame, which gets its name from the shape of the letter “A” that it gets once it is built. While it is very similar to the lean-to frame, the A-frame type of shelter exposes a much smaller entrance to the wind. This type of shelter is a better option for windy and rainy environments. The A-frame also provides insulation for hot and cold climates.
Materials
- Cordage
- Tarp/Poncho/Space Blanket/Wood
- Leaves/Spruce/Moss
Instructions
- Build a bed or some insulation system to separate your body from the soil. According to the length of the bed, you will need to adjust the size of the materials for the rest of the process to fully cover the bed. You can also build the frame of the bed with two or three logs that are about the same size as your wrist. Use leaves or spruce for insulation.
- Make the frame of the shelter by cutting a piece of wood that is long enough to cover your entire height when you lay down below it. Consider building a frame that keeps a piece of wood high on one end and stands on the soil on the other end in the shape of a tripod. Alternatively, you can lean one end of the piece of wood onto the branch of a tree or between two trees. If you use a tarp or similar, you may tighten cordage between two trees parallel to the ground to use as the frame.
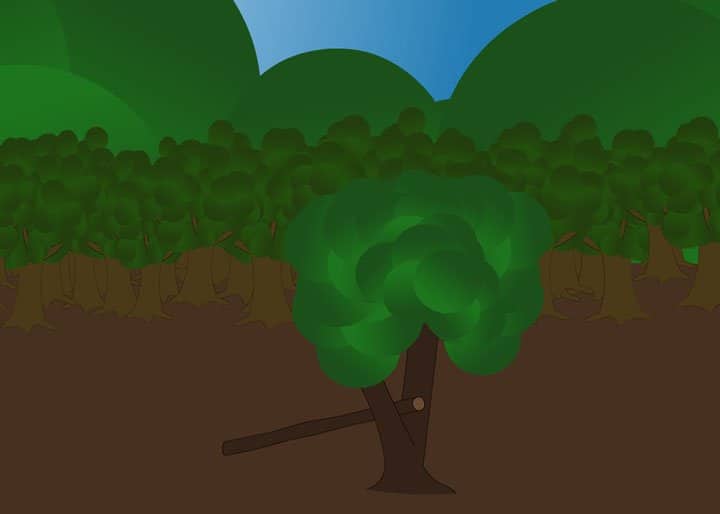
- Cut pieces of wood that are progressively longer. Lean them from the bottom to the top of the frame to create a roof shape on both sides of the long piece of wood. If you used a tarp (or substitutes) all you need to do is secure the four ends of the tarp onto the ground.
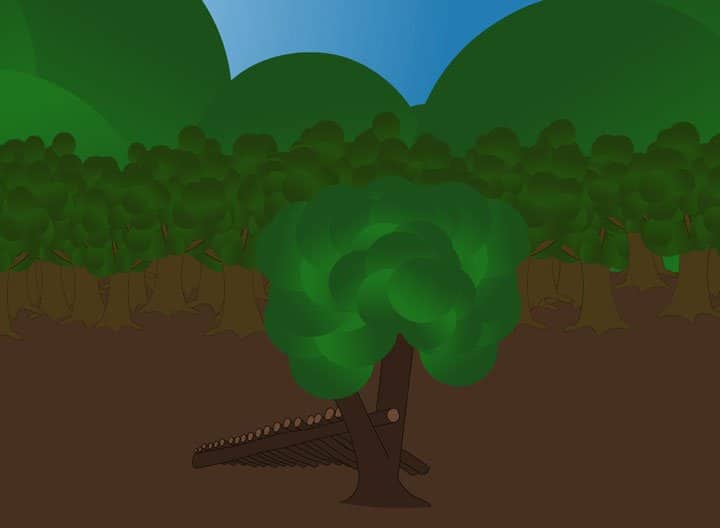
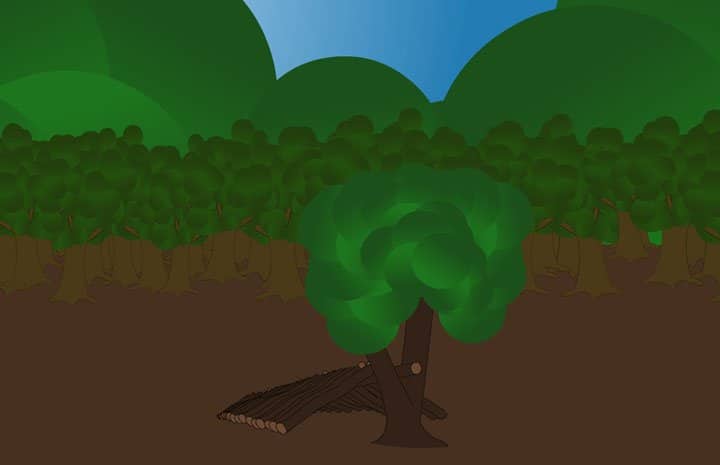
- Insulate the roof with spruce, dry leaves or moss if possible. Start building it from the bottom to the top to keep water from dripping in, in case of rain.
A WORD FROM THE AUTHOR:
If you wish, you can build the roof of this type of shelter with wood and natural insulating material like spruce, leaves and moss. This setup would allow you to conceal the shelter, much better than the lean-to type of shelter, because it is shorter in height.
If built with wood, the A-frame shelter can also provide protection from wind and rain. The tarp version would be effective against rain, but the gap on the ground would allow wind to go inside. You may want to find a way to close that gap with some weight along the edges of the tarp.
Many people build very small shelters that can barely accommodate them. If you move during your sleep you may kick some of the walls and open breaches into your shelter. So, leave enough room for a good fit and make it comfortable to avoid accidents.
Putting Your Skills to the Test
Building a shelter is a skill that should be practiced before finding yourself in the situation of needing to do it. Regardless of your reason for being outdoors, you should always be prepared for times when things don’t go as planned.
Things that we may take for granted in everyday life, such as the right clothes and basic shelter are crucial to prevent hypothermia and will help give you a chance to survive for a few days.
Having shelter will allow you to concentrate on taking care of finding other essential things for survival such as food and water while someone comes to rescue you. And when it comes to shelter, aesthetics are the least important part of it. Functionality is all that will matter to keep you warm and dry.
Furthermore, remember that the most important purpose of shelter is to protect you from the elements, but always stay alert and prepare for anything that could happen, so that you may stay safe and guarded.


