In my experiences outdoors, there have been countless instances where I was glad to have my machete sheathed at my side.
Its sharp edge has served faithfully as a bushcraft multitool and provided a sense of safety during potentially life-threatening encounters.
There’s no doubt in my mind that any of these situations could have ended poorly had I not learned how to sharpen a machete.
How To Sharpen a Machete in Four Easy Steps
Machetes are designed for simple at-home maintenance as long as you know what you’re doing. Follow the steps listed below to sharpen a machete easily.
1. Choose Your Method
First, you’ll need to decide which tool you want to use for the task.
The mill file is the least expensive option, though it requires a lot of work to get the edge just right. You’ll be manually pushing a relatively narrow area over the entire length of your blade, over and over, until it’s well-honed.
That said, files are helpful if you want to control how much initial metal you’re taking off when restoring ancient, dull blades or if you need something lightweight to toss in your backpack before you hit the trails.
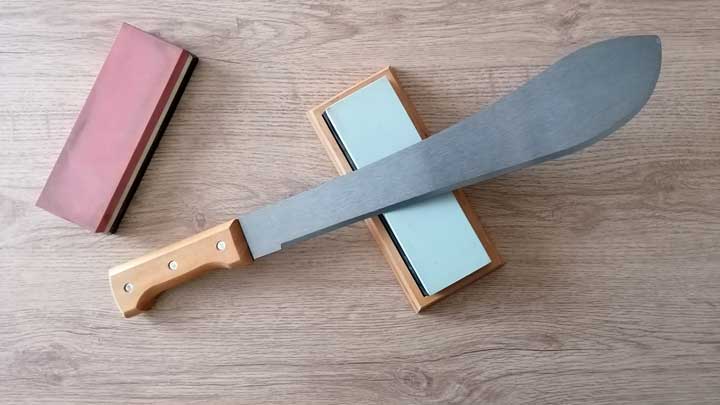
Whetstones or sharpening stones are also popular tools. You’ll need to practice the circular hand motion and keep the machete in your non-dominant hand while you work.
This can be tricky for beginners, but it’s worth learning because these old-school sharpeners give you excellent control when creating a beautiful, clean edge.
If you have the hardware, many machete pros like to place the blade on a belt sander, as it shoulders most of the effort and puts a clean edge on in no time flat.
Just be aware that you can take off a lot of metal without realizing it, especially if you’re going at it with a low-grit paper.
Regardless of the sharpening tool, always work from the hilt to the tip and hit both sides of the edge for maximum sharpness.

2. Rough Grind
You’ll want to start with a coarse grind to eliminate large knicks, especially if it’s been a while since your last sharpening. Going at it with a fine grit file, stone, or sander will require a lot of unnecessary effort, and wear your arm out, which can be dangerous in survival situations.
Start by pushing your tool over one side of the edge until you notice small metal shavings, or burrs, forming. If you’re on the sander, you’ll want to run the blade along the sandpaper as it rotates, curving your machete to hit every inch.
Then, swap sides and repeat. The burrs should grind away as you sharpen, leaving the blade smooth.
Keep in mind the angle you want on your machete as you work. If you tend to use it for non-woody vegetation, like grass, you’ll need a much smaller angle– around 25 degrees– for effortless scything.
On the other hand, chopping requires a broader angle of around 35 degrees, or you leave your blade vulnerable to chipping.
3. Hone the Blade
Once the raw edge is on the blade, you can clean things up with a finer grit tool. This step is beneficial if you’re struggling to get rid of smaller burrs or just need to shave a few more degrees off the angle.
It’s also a great way to practice sharpening with the belt sander, as a mild abrasion gives you more leeway to move along the machete’s curve without ruining the blade. Start with a file or stone to get the primary hone, then clean it up with a polishing-grade grit on the sander.
4. Put Your Machete to the Test
The first few times you try at-home survival knife sharpening, you’ll want to test the blade to detect any missed burrs and ensure the edge is as sharp as it looks.
Start by running a piece of paper over both sides of the edge, listening closely for any indications of catching or dragging. You’ll need to refine the edge further to eliminate any roughness.
Finish up with a few whacks on a board or branch. If it cuts through like butter, you’re good to go. Otherwise, you’ll want to recheck the angle and resharpen until you’ve achieved the edge you’re looking for.
Frequently Asked Questions
Learning how to sharpen a machete can be overwhelming, but I’ve covered some of the most commonly asked questions about the process to help you feel more confident in your blade-honing abilities.
What do you use to sharpen a machete?
When choosing what to use to sharpen a machete, it comes down to personal preference and the tools you have on hand. I think a belt sander and vice grip get the cleanest edge, but I always keep a field sharpener on hand for on-the-go honing.
Do machetes need to be sharpened?
Machetes need to be sharpened regularly to maintain their edge, no matter how high-quality the blade is. You’ll know it’s time for a touch-up when you’re putting more effort into your swings or the edge isn’t cleanly slicing through grasses or brush.
Can you use a sharpening stone on a machete?
You can use a sharpening stone on a machete. They’re helpful if you don’t have a field sharpener on hand.
Summary
A dull blade is more dangerous than a sharp one, especially when you find yourself in danger with nothing but a worn-down machete to work with.
Learning how to sharpen a machete at home ensures you can rip through obstacles, blaze a trail in briars or brambles, and defend yourself when necessary.
Once you’ve found a method you’re comfortable using, be sure to test your tool before you take it into the field, and always carry along a file, whetstone, or sharpener when you head into the great outdoors.


