Judging from the popularity of survival-style reality shows, everyone wants to be an outdoor survivalist. However, being in a real-life survival situation is not as shown on television.
People either face the wilderness because they’re outdoor enthusiasts or they’re inexperienced and end up stranded and in peril.
The best advice for both situations is to remain calm and to study the environment. Knowing how to build a bushcraft shelter is the difference between surviving the elements and not.
What Is a Bushcraft Shelter?
A bushcraft shelter building or bushcraft earth hut is a temporary shelter. Knowing how to construct a well-constructed dwelling for you and your gear is imperative, regardless of why you need to build a shelter. It’s part of employing a learned bushcraft skill set that includes building a shelter, making fire, foraging for food, and sourcing drinking water.
Many elements come into play when you enter a forest or a nature reserve or become lost in vast and unforgiving terrain.
Out in the wilderness, a bushcraft survival shelter isn’t a replacement for a permanent shelter, a home, or a cabin. The main purpose of crafting a bush shelter is to prevent exposure and provide essential protection from predators. A well-designed shelter also provides a sense of safety in the vast wilderness. In survival situations, a sense of safety is a powerful tool. A bushcraft shelter is a dwelling made from natural materials within reach. Nature provides it if you know what to look for. I consider many specifics before expanding unnecessary calories to build your shelter.
A bushcraft shelter, however, is my first defense against the environment.
The Easiest Type of Shelter to Build in the Wilderness
Wilderness means an untouched natural environment where people can survive for a short time. It doesn’t mean a paradise full of organic fruits, roots, and fallen timbers to take shelter from. Survivalists thrive on using our senses and discovering purpose. It’s a serene feeling.
The easiest shelter takes advantage of the natural elements in your surroundings. That could be trees, bushes, rocks, caves, or in extreme cases, snow.
Since I’m talking about bushcraft shelters, I’m describing building my survival hut from fallen branches, trees, and other scavenged materials.
Reasons behind proper bushcraft shelter designs:
- To protect me from the elements and nightfall
- To ward off animals, night predators,
- To make me feel secure and provide comfort
- To store my gear
A bushcraft shelter is a crude dwelling that might keep out prowlers, like a raccoon, or a mink, but annoying insects, rodents, and reptiles will find their way inside.

Important elements I consider about where I build a bushcraft shelter:
- Scour the surroundings for an elevated and protected area
- Consider wind and sun direction
- Don’t build near streams or other water sources
- Avoid building near dead or weak trees
- Watch for animal corridors
- Don’t choose an exposed location
- Rocks provide a natural wall, but they can also draw water
- Well-used deer beds are a safe location
A basic lean-to might get me through the first night. I always know the basics about the terrain I’m exploring. Even being lost in a national park can have dangerous consequences. Knowing how to build even a crude tent-like structure helps save body heat which is crucial to prevent hypothermia.
Smaller is better. I build my bushcraft survival shelters to keep me warm and comfortable. If you build it large, it will have more airflow, but it will be difficult to retain heat.
If you intend to camp in your bushcraft shelter, consider increasing its size and even building access to a fire source.
Choosing an A-frame shelter offers protection on all sides, even if you leave the entrance exposed. However, I construct a doorway from movable evergreen branches to ward off the cold, critters, and wet conditions.
Staying dry is so important; therefore, an A-frame is a better solution than a lean-to shelter. Of course, the location will also dictate which type of shelter is better.
Although protection from the elements is essential, a feeling of security adds to the overall comfort. A secure shelter brings peace of mind.
How To Build an A-Frame Bushcraft Shelter From Scratch

Starting on your bushcraft shelter before nightfall or weather conditions worsen is imperative.
Make a logical choice when building your shelter; sometimes, it’s possible to use the materials nature provides. Fallen trees and tree limbs are great starting materials.
- Choose a ridgepole. A ridgepole should be a straight limb. It acts as the spine to hold up the shelter’s ribs and supports your A-frame structure. Lean this pole against a tree branch, a rock formation, or fallen logs. Secure it to the base with twine, cording, or rope, or forcefully wedge it into place. I use my height to gauge how long I want the ridgepole to be. I want it to be long enough to stretch out beneath it and be comfortable. Night can be agony if you’re cold and uncomfortable.
- Next, I find the support poles, sometimes called arms. These two post shape the front of the bushcraft shelter into an A-opening. You can also build a double-ended A-frame shelter. These poles should be tall enough to create a tent-like structure that allows you to move inside the cover but not be too tall to waste valuable heat.
- Scour the area close by for the sidewall structure. The sidewall branches are called ribs. I make these ribs from branches or evergreen boughs, depending on how pressed I am for time. If you can, create a frame with straight poles, spacing them approximately 3 to 6 inches apart, then fill them with boughs and moss. For extra support, I jam the bottom end into the soil. The branches should be a uniform length. Get the basic shelter done fast, you can always tweak the shelter.
That is not what an A-frame structure is about. An A-frame bushcraft shelter isn’t permanent. It’s to provide you with a reasonable shelter in the shortest time possible.
If you need rescuing, draw attention to your shelter. Drawing attention to your bushcraft hut makes it easier for aerial surveillance teams to spot you. Animals like bears and wolves already know you’re there because they picked up your scent when you arrived.
In dire survival situations, moving might make rescue more difficult. For every mile you move off the target area, you expand the search parameters by three. Rescuing a stationary person is less challenging than a moving target.
Tip: In survival and rescue situations, follow this principle. STOP means Stop, Think, Observe and Plan.
Building a Shelter in the Woods for Beginners
Take this advice, fellow nature lovers new to building a bush shelter. I recommend that you practice building a shelter before heading into the wilderness. Better yet, hire a seasoned survival expert to initiate you to bushcraft.
It could be the difference between having the most thrilling life experience, failing miserably, or endangering your life.
Check out this short video for simple bushcraft shelter ideas. These essential tips are customizable.
One of the most important tips to remember, regardless of how plain or fancy you build your shelter, is never to sleep on the bare ground. Nature provides nesting materials like evergreen boughs, leaves, grasses, and moss to make an off-the-ground bed.
Tip: If you don’t live on an acreage, head to the nearest park. Familiarize yourself with a typical wilderness landscape and what resources nature provides. Always let friends and family know where you are going.
How Long Does Building a Bushcraft Shelter Take?
There is no easy answer. It depends on your skill level, resources, and environment. If you’re going into the bush prepared with proper tools and have access to materials, you can build a decent shelter in under an hour.
Weather can also impact how quickly you can build a shelter. If it’s miserable, it will serve you well to move quickly to erect a primary dwelling to get out of the elements and get warm and dry.
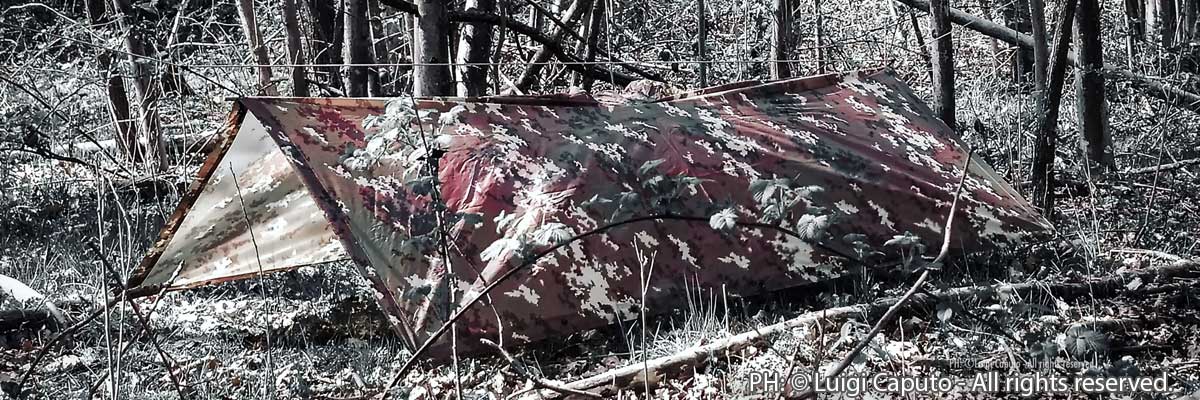
When I trek into the backcountry and have the luxury of having access to tools and non-natural building resources like a tarp, rope, and food to refuel, I take my time and build something semi-permanent.
Try mastering a Wigwam using traditional materials and building methods if you want an authentic experience that pays close attention to respecting the land. Building a Wigwam takes practice and understanding your resources.
Some saplings or plants in your local parks might be vulnerable and deserve protection. Identifying tree species is another learning curve of becoming a survivalist and bushcraft shelter builder.
Building an advanced reusable A-frame shelter will take considerable time and energy. The upside is that you can potentially salvage the hut and use it throughout the season.
What Does it Take to Build the Warmest Survival Shelter?
It takes grit, planning, hard work, time, and skill to build the warmest bushcraft shelter. The warmest bushcraft shelter is an advanced version of an A-frame, a log cabin, or a teepee (tipi).
Native Americans wrote the book on how to survive in the elements respectfully and successfully. Albeit, it doesn’t mean it isn’t hard to survive in the wilderness. Teamwork, planning, and understanding the landscape are vital tools that the indigenous used for millennia to survive.
To build a warm shelter, I plan the structure. In an actual survival situation, planning becomes even more critical. I use the resources closest to me.
When I build a structure with logs or strong limbs, I will have a solid foundation to craftily insulate with boughs, twigs, moss, bark, clay, and leaves.
As already mentioned, doing a practice shelter building run is so important. Learning from my mistakes is the best learning tool and is ultimately easier than calling 911 from deep within a national park without cell service.
My bushcraft design incorporates a firepit with an updraft to draw smoke from the shelter. Creating a chimney from rocks and clay is worthwhile when I plan on spending a long period in my mock cabin.
Inhaling smoke or carbon monoxide has deadly consequences.
Tip: As you gather building materials like logs, twigs, and rocks, always be cautious of your surroundings. Falling limbs are called widowmakers for a reason. While many animals are more active at night, predators stalk you during daylight hours.
Beware of:
- Kickback from saplings or large branches when you chop them
- Never saw over your legs or arms, instead brace whatever you’re sawing or axing on a rock or stump
- Watch the swing range when you use an ax
Best Materials to Insulate a Bushcraft Shelter
The warmest survival shelter is a well-constructed building that mimics a home. Once I finish the basic structure, I fill gaps with clay, moss, boughs, or leaves to seal any drafts.
Of course, finding suitable insulating materials depends on your location and your season. You’ll be hard-pressed to find moss for a shelter in Arizona. What’s important is to learn to utilize the natural debris in our surroundings.
If you’re in the boreal forest, you’ll have access to many building and insulating materials. Using a utility bushcraft knife, carve the bark and harvest a resource without damaging the tree. Bark also has fire-retarding properties.
Moss has many exceptional properties. It’s’ why you see survivalists on television programs peel large swaths of it from rocks and the ground. Moss has natural insulating properties, which means it adapts and keeps you warm during winter and cool in summer.
Moss is also pliable, so it fits easily among cracks and is lightweight. So even if you have to gather it from a distance, you won’t expend needless energy transporting it to your camp base.
Aside from being insulative, moss is also a natural water filter. It’s used as a wound dressing and fire tinder and has other medicinal properties as a food source.
Evergreen boughs are an amazingly dense insulation material that grows rampantly in the forest. Without tools, you’ll have to snap it off, carefully handing the pine, spruce, hemlock, fir, and redwood. Contact with fresh-cut boughs can cause skin irritations.
Tip: Knowing your native plants is a lifesaver.
Three Basic Types of Survival Shelters
Basic survival shelters have several functions: to keep you warm and dry, protect you from the elements, and provide you with a secure place to rest.
The most basic types of bushcraft survival shelters are the debris hut, lean-to, and A-frame shelter. These basic shelters also define bushcraft. Bushcraft is the skill to adapt to outdoor environments with limited resources.
The Debris Hut
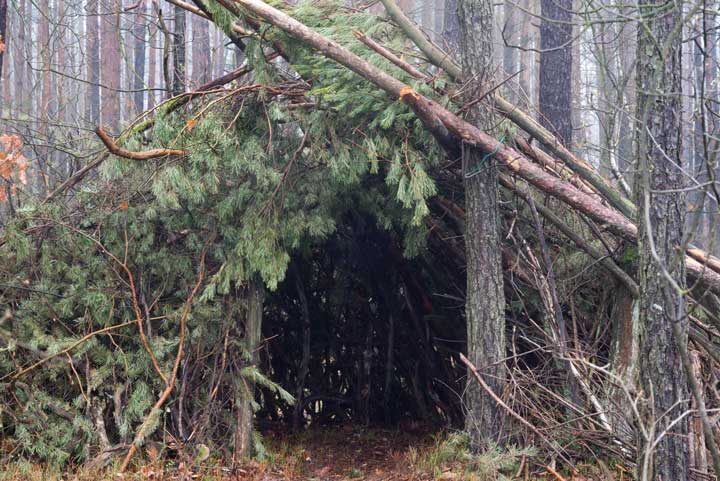
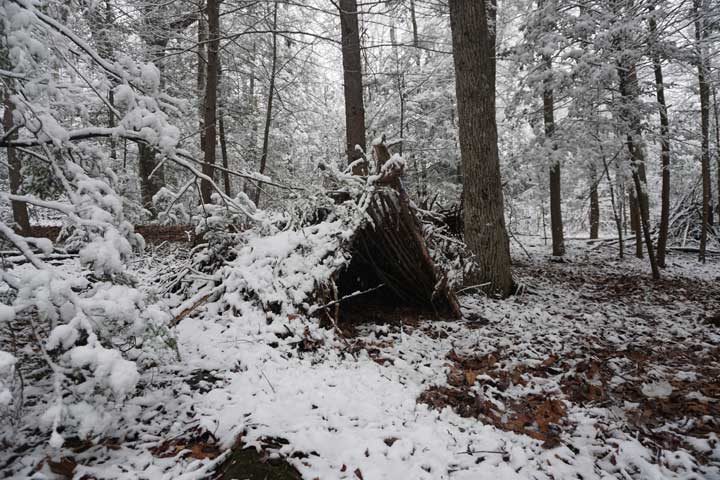
The debris hut is a primitive but potentially lifesaving shelter. It’s a modification of the A-frame and uses a ridgepole on the ground. Debris huts are low to the ground and large enough to hold one person. Often, I take advantage of what’s around me without expelling too much energy.
A debris hut is a crude structure for instant protection from the elements. Simply find your ridgepole and mount or wedge it to a semi-low stump or fallen log, allowing an opening wide enough for you to crawl into.
Brace the sides with rib material like pine boughs if you don’t have any tarping material.
By restricting the size, you save on heat. Typically a debris hut makes scavenged materials and dry leaves. On occasions when I’m making a mattress from leaves, I ensure they’re dry and 4 inches thick. I use my knapsack to block the opening at night.
For extra insulation during cold weather, gather leaves or snow and build an insulating wall around the structure. This effort also prevents convective wind from seeping into the structure.
Tip: Since leaves provide a natural rain barrier, dig below the first few inches of the fallen leaves and excavate the dry leaves for your bedding.
Lean-to Shelter
A lean-to is also a simple type of bushcraft shelter that’s ideal for temperate weather. You can construct a lean-to by tying a ridgepole or cross pole between two trees. I always check the wind to prevent exposure to the elements and camp smoke.
Once the cross pole is secured, I line the structure with vertical cross-hatching twigs or branches, creating a 45 ° angle. I also place the leafy branches or boughs in natural draining position to channel water away.
The lean-to is great when I can have a fire close by (at least one good-sized step away), and I’m not dealing with heavy rain or snow and moving on the next day. Like all bushcraft shelter huts, I can make them as fancy as my resources allow.
A-Frame Shelter
A-frame bushcraft structures are the better choice in harsher climates. The A-frame is simply two lean-to shelters merged into one and helps repel rain and wind on two sides. Make sure you don’t have any branches penetrate outward, or you’ll draw rainwater inside.
As the temperature plummets, I add thicker thatching from boughs, moss, leaves, and other debris. An A-frame shelter can be as complex and semi-permanent as I desire at the moment.
Keeping Campfire From Smoking Out Your Shelter
For obvious reasons, most temporary bushcraft shelters like lean-tos, debris huts, and A-frame shelters aren’t compatible with interior fires. Unless you understand the bushcraft method of building a firepit and shelter, another skill I practiced until I perfected it.
Fire is a powerful tool and needs air and dry wood to burn efficiently. If I build a fire in a confined space, I dig escape channels for the smoke.
In a perfect situation, I’ll have access to dry, seasoned wood and enough room in my shelter to accommodate a proper, well-ventilated firepit. If not, I create an adequate firepit ring with stones. You can use clay or even dirt as a filler to prevent gaps between the rocks.
Another great way to extrapolate heat and not set your shelter on fire is to build a reflector wall that bounces heat back toward your shelter and lets the smoke rise. Planning your firepit location and wind direction (which always changes) is vital.
If you come to the woods prepared and have access to a tent and other gadgets, there are many ways to heat a tent or shelter without electricity.
Tip: I fill my pocket with tinder materials whenever I hike into the woods. I peel off bark from birch trees and red cedar. I also collect cattails, dry grasses, or unused birds’ nests. I also practice various methods of starting a fire with and without flint.
Conclusion
Learning how to build a bushcraft shelter takes practice and commitment. Exploring our beautiful planet by trekking and camping in the wilderness takes skill and a ton of prevention. Practice gratitude and remove all the unnatural items you brought into your camp.
Leave an impression but not a footprint.
Bushcrafting isn’t a skill you develop overnight, nor do I hope you’ll have to find out the hard way to survive without some basic know-how. Remaining calm is essential. You have a good survival chance if you can build a shelter, fire, and find water.


